Friday, January 31, 2014

25 Fun & Random Questions for a Kids Interview

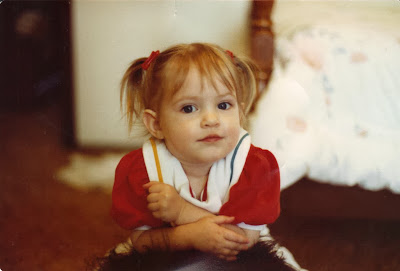
With this month's theme being "Preserve Your Memories", one of the ways you can do that is by doing an interview!  My last post was on doing an interview as husband and wife, which you can find HERE.  But this post will focus on doing an interview with your children! Some people like to do this once a year and then it's fun to see how they've changed from year to year, but even if you just get one interview out of their entire childhood, it will be so great to have!

You can print out the questions and fill out their answers and then slide the page into a baby book
OR
It would be even more fun to capture the interview on video.  Trust me, you will cherish this for years and years to come. 

When you are doing a video, it is fun if you can get their personality to come out. You don't want to be stuck with a lot of one word answers.  Try hard to get them talking. Hopefully some of these questions can help with that:

1.  What is your name?
2.  How old are you and what grade are you in?
3.  What is your favorite_____ and why? = Color, Movie, Game, Book, Food, Drink, Sport, Restaurant, Activity, TV Show, School subject, things to do in your free time, Song or Music
4.  Who are your friends? And what do you like to do with them?
5.  What is your favorite thing to do with your family?
6.  What do you love about your mom, dad, brother, sister?
7.  What do you absolutely hate to do?
8.  Which food grosses you out the most?
9.   If you could go anywhere, where would you go?
10.  What do you want to be when you grow up and why?
11.  What are you afraid of?
12.  If you could be any animal, which one would you be and why?
13.  What are you really good at?
14.  What is something you want to get better at?
15.  If you were granted one wish, what would you wish for?
16.  What could you eat 10 of right now?
17.  What is your favorite store to shop at?
18.  Do you have a favorite joke?
19.  What chores do you have to do and what do you think about them?
20.  If you could meet anyone famous, who would it be?
21.  What is something your mom always says to you?
22.  How strong is your dad?
23.  Do you think you'll ever get married and have kids someday? How many kids?
24.  What is the nicest thing you have done for someone? Or that someone has done for you?
25.  Have you lost any teeth? How did they come out?

Wednesday, January 29, 2014

Interview Questions for a Couple

As our month's theme "Preserve Your Memories" comes to a close, I wanted to talk a little bit about videos this week. And I'll start with the idea of videotaping an interview. 
About 5 years ago, I saw a video online of a young couple being interviewed about how they met, etc and thought it was the best thing ever.  As I had started doing wedding videos, I started to offer a "Love Story" as an extra service.  Here is an example of one of my first ones.  Click on the HD before you watch them!:

Love Story - Jon and Jaclyn from Aub Howell on Vimeo.

And I decided this is an amazing idea, that EVERYONE should have one of these.  No matter how old you are!  My aunt and uncle wanted one for their 25th anniversary.  So here is a little part of it:

Lauri & Scott - Interveiws from Aub Howell on Vimeo.

And then just a year ago, my sister in law asked if I'd do one for their 10th anniversary. 

Kam & Rosi - A Love Story teaser from Aub Howell on Vimeo.

When you do one after being married a while, there is a lot more to talk about and so those videos ended up being about 30 minutes...so those videos above are just a sample of each one.  And granted, you don't need to do anything this fancy, but how fun will it be to look back on this later in life, or for your kids to have.  I think it would have been so fun to have something like this from my parents! 

All you need is a video camera, a tripod and some video editing software.  It can be so simple. And like I said, you do not need to do anything fancy with it...you will just love having the interview.  But you can always hire someone like me to do it for you. ;)  I know you will love having it on video so much more, BUT another option is to just write it all down. ;) That's better than nothing. 
 
Here are some sample questions you might use for your interview:
 
**TIP** It can be REALLY fun to do your interviews separately, without the other spouse listening in.  It's fun to see their viewpoint on everything without being influenced by the other person.

For an engaged or newly married couple:
1.  How did you meet?
2.  What was your first impression of him/her?
3.  Tell about your first date and/or a memorable date.
4.  First kiss?  First time saying 'I love you'?
5.  How did he/she propose?
6.  What do you love about him/her?
7.  Describe him/her as if you were telling someone who didn't know them.
8.  What do you look forward to in the rest of your life together? Hopes, dreams, etc

For a married couple:
1.  All of the above questions
2.  You've been married for ___ years.  How would you summarize those years together?
3.  Describe your spouse in 5 words and why each word
4.  What do you remember about the day you got married? (Schedule, feelings, etc)
4.  What are some of your happiest memories?
5.  Have there been any significant experiences or trials that you'd like to tell about?
6.  When did you decide you were ready for kids to join the family?
7.  Your children...how many, your experience as each of them came into your life, etc....can be very general or very specific. It's up to you.
8.  What would you like to say to him/her?

This can also be a GREAT gift idea...for an anniversary or even Valentines Day.  Good luck to you!!!

Wednesday, January 22, 2014

A little Downton Abbey

downton abbey, downton abbey quotes, preserve your memories, memories
It's funny how this little PBS show, Downton Abbey, has stormed the world!  LOVE this show!  If you haven't yet begun to watch it, you still can, and you will love it.  But don't worry, this post DOES have something to do with my blog.  

This month's theme is "Preserve Your Memories" and as I watched this latest episode from Season 4, the butler Carson had something to say that I felt deserved to be blogged about. hahadownton abbey, downton abbey quotes, preserve your memories, Carson Downton Abbey
Carson received a gift from a friend...a framed photograph of a long lost love.  Despite her love for him, she had chosen another man long ago and he had since found out that she had passed.  His friend thought it might not hurt anything to be reminded of LOVE.  And so Carson thought a moment, and then agreed. He said, 
"The business of life is the acquisition of memories.  In the end that's all there is"

And I thought that was so very nicely put.  There are many definitions for acquisition, but I feel the intended use of the word would be similar to "gaining" or "obtaining".
And so it's true, isn't it?  
Our memories are so important. 
This whole month has been about preserving them.
Creating them. 
Cherishing them.
Keeping them safe. 

My post Preserving Your Memories will give you an update on everything we've covered so far.  Get started today! 

As for Downton Abbey, you can find episodes online here : http://www.simplyjune.org/p/downton-abbey.html

And then here is the quote put on images for you to PIN to pinterest if you'd like :)


Sunday, January 19, 2014

Turning your old scrapbook into a BOOK

 scrapbook into a book, photo album ideas, preserve your memories, scrapbook ideas
 Honestly, I love scrapbooks, but I think their time is coming to an end.  At least the kind of scrapbooks where each page is carefully arranged by hand and placed into a plastic page protector and then held in a huge and bulky binder! I probably have about 10 of these because I did one for my husband and started them for my kids, etc.  They take up so much space that they are kept in a cupboard in the basement, so no one really even looks at them!

On top of that, most of my scrapbooks are filled with non-digital photographs.  So I  knew I needed to get them scanned and in my computer in case anything ever happened to them.  But all the photos are glued in...so the best thing to do is just to scan the entire page.  And then from there, you can always crop to the exact photo you need, etc.  
 
I thought it would make sense to place each page into an online book.  Look at the difference between the bulky and the new & crisp hardbound book!
 It's pretty much keeping your exact layout..the pages look the same 

 
HERE'S HOW TO DO IT: 
1.  SCAN every page of your scrap book.  This can take some time, but it's not bad.  There are also places that will do this for you.  But this way you can preserve the page the way you made it and not just the photos alone.  Yes, I would probably do the pages different if I were starting over today, but keeping the page as is, is kind of fun.  Plus, it took a lot of work at the time! haha
 
2.  CHOOSE who you want to go through to make your book.  My pages for this specific scrapbook were 8 1/2 X 11, and so I went through blurb because they were the only one I could find that had an 8 1/2X11 that was a 'portrait' landscape.  My book was 46 pages and with shipping and everything my total cost came to about $44.00.
Costco has comparable prices, if not a little bit lower, but as you can see, these were my only sizing options and that didn't work for me, but they may work for you:
 Shutterfly is another book company I have always liked to use...but it gets pricey to add more than 20 pages.  But again, they didn't have the size I needed anyway.
 
3. UPLOAD the scanned scrapbook pages into the site that you've chosen.  If you've ever made an online book before, it's just like uploading pictures (jpgs).  
 
4. LAYOUT your book so that the photo (your scanned page) will fill the entire page. I preferred to have a small edge around each photo because I was not sure how the final book would turn out, as far as if any of the edges would get cropped.  I think it turned out perfect.
 
 
5. DRAG & DROP each page of the scrapbook into your new book in the order they were in your scrapbook.  You should not have to do much else, as far as adding text or anything because you already did that in your scrapbook!  It probably took me 15 minutes to get all my pages in. SO EASY
 
6.  FINAL TOUCHES like the cover and the binding can be fun to customize.  I decided to add a picture and did my titling in fun fonts.  You can also add the title to the binding. 
 
7.  ORDER!! I highly recommend what they call an IMAGE WRAP hardback book. Your picture and title are printed onto the cover....it's great quality and then you don't have to worry about one of those "dust jackets" that just always fall off and get ruined.
 
I was so excited to get mine in the mail!! Now I just have to do the rest of my scrapbooks!  It is a little pricey, so I might have to spread it out maybe doing one a month or every other.  I struggled with whether or not to throw out the bulky scrapbooks now, just to clear space.  But I can't bring myself to throw them out because they contain the "actual" letter, or the "actual" concert tickets.  haha.  I guess I'm a little too sentimental. ;) 
 

Wednesday, January 15, 2014

What to do with your non-digital photos

We've talked about how to organize your digital photos on your computer.  But what about all your non-digital photos that are in albums or boxes? 
what to do with non digital photos, organizing photos, organizing non digital photos
 We all have them.  Printed photographs from before everything went digital.  Whether they are being kept in old, sticky photo albums, boxes or envelopes, or even nice & well kept albums, there are measures you need to take to guarantee they survive long enough to show your grandchildren.
organizing non digital photos, what to do with old photos, preserving memories
ESPECIALLY the photos kept in those old, sticky photo albums.  You know what I'm talking about? The pictures stick into place and then there is a plastic covering to help protect the photos.  GET THEM OUT!  Look how yellow this album has become.  That stickiness is toxic enough to start eating through your precious photographs.  If they've been in there a long time, you can have a horrible time getting them out.  I've heard dental floss helps....possibly even heating the page a little with a hair blow dryer and using the dental floss.
sticky photo albums, old photo albums, what to do with old photos, non digital photos
 Even if you have a high quality album to hold your photos, you will want to at least get them scanned so that if something happens to the album, they won't be lost forever.  Plus, it's fun to be able to share them digitally, like putting one of my wedding and baby photos in this blog post!  haha


Here are 5 steps to help preserve your non-digital photos and get them ORGANIZED:

1.  SORT the photos and decide if any can be thrown away.  I would suggest either sorting them by person or by year.  However you think you would like them organized.

2. SCAN THEM.  Why? First, it will give you extra copies of your photos, just in case something were to happen to them.  Second, it allows you to share them digitally, whether through social media or by making a slideshow or online photo album.  I have had friends email me old photos from college and it's so fun!! A great way to share! I understand many of you will have your photos in SCRAPBOOKS.  Yes, these still need to be scanned, but instead of tearing your scrapbook apart, you can just scan the entire page. I will do another post on this later.

If you have a scanner at home, scanning your own photos can be easy....it just takes some time.  If you don't, you can invest in one or pay someone to scan them for you. 

3.  DECIDE if you want to keep the originals or throw them away. After all, if you have them on your computer you can always print them again if you ever want to. 

4.  LABEL them.  Do a quick label on the back...at least the name and year.  I don't know how many photos I've found in my grandma's house that I have no idea who is in them!  Very frustrating! If you are throwing away the originals, then you still need to keep them organized on your computer.
 
5.  DON'T LEAVE THEM IN A BOX.  It doesn't matter what you do with them, and it doesn't have to be fancy, but make sure they don't stay forgotten in boxes.  For ideas, check out my last post, "DO something with your photos".
preserve your memories, what to do with non digital photos, cute photo albums
 

Monday, January 13, 2014

DO something with your photos

 Ok, you've taken your photos.  Where are they?  Maybe on your computer, on your phone, or even in boxes.  What was the point in taking them if they are being hidden away?  Here are some ideas to help get your photos out of a box!
ideas for photos albums, preserving memories, what to do with photos, scrapbooking
 
 
 SCRAPBOOKING

scrapbooking, do something with photos, what do to with photographs, preserve your memories

scrapbooking, do something with photos, what do to with photographs, preserve your memories
  Whether you still love crafting your own scrapbook or if you've learned to do it digitally, scrapbooking can be one of the most enjoyable ways to look at your photographs....IF you have the time for it.  I LOVE my scrapbooks, but the truth is, I've been years behind on them ever since I started!  If you love scrapbooking and don't want to let it go, I would at least recommend learning to digital scrapbook.  It gives you almost the same result, minus the paper collecting, cutting and pasting.  If don't have the energy to learn this new skill, try out the next best option below.
 
ONLINE PHOTO BOOKS 
online photo books, digital scrapbooking, preserve your memories, do something with your photos
Create your own photo book online!  There are so many sites out there that make it easy to create a fun book that has all the cuteness of a scrapbook, but is a lot less time consuming. I've tried several and think they are all pretty good.  If you see groupons or other deals for these photo albums, grab them! I have used Shutterfly, Snapfish and Picaboo.  But I wouldn't recommend them if you are doing many pages more than 20.  It gets pricey.  If you are doing more than 20, I would highly recommend going through Costco!  A BIG advantage to doing an online photo book is that it is WAY less bulkier than a scrapbook!

ALBUMS 
cute photos albums, scrapbooking alternatives, do something with your photos, preserving your memories
 
cute photos albums, scrapbooking alternatives, do something with your photos, preserving your memories
If you just want to get your photos in an album without all the hassle and fluff, then these are for you!!  And there really are some cute ones out there!  They can be found anywhere from Target, Walmart, Kohls, or even online through places like Amazon.  All you need to do is place your photos in the sleeves.  Some even have a space to write a quick description if you want.  So simple, but still so fun to flip through and see all your photos!
 
FRAME SOME OF THEM 
cute photos albums, scrapbooking alternatives, do something with your photos, preserving your memories
There are so many collage frames and if you have some extra wall space, whether in an office, guest room or basement, it can be fun to display them in a collage frame on the wall. I think I got this one for $5 from Michael's.  So easy.  I am excited to fill up some of my basement wall space with these. 
 
My grandma actually inspired this option.  She has so many photos, she started sorting through them and deciding which ones to put on the walls of her office.  It's always so fun to go over and look at them! Great job, Grandma!!
 
These are only the most basic options for what to do with your photos.  There are so many clever and crafty things out there that the list could go on.  Maybe for another post. :)  I hope I have inspired some of you to get your photos out of a box, or off your computer, and DO something with them!! I would love to hear what you've done! Comment or email! 

Wednesday, January 8, 2014

4 ways to take more meaningful photographs

Yes, I just did a post on taking less photos!  haha  So this post isn't to encourage you to take MORE photos, but just to make the ones you DO take more meaningful. What "meaningful" means, will be different for each person, but I wanted to share what I found for myself:
  
I started to find that I took pictures of the SAME things every year...holidays, birthdays, pumpkin patch, the school Halloween parade, the dance festival, the sports the kids play every quarter, the summer parades, etc.  I didn't really think about it until I went to put together my books with my photos in it and I realized that each year is starting to look the same!  I found that I rarely take pictures unless there is something big going on.  And those "big things" going on are usually the same year after year.  So I decided I wanted my photos to feel more SPECIAL than that and so here are my thoughts:
ways to take more meaningful photos, meaning to photographs, photo tips, preserving memories
1.  STOP GETTING OUT THE CAMERA JUST BECAUSE IT'S A HOLIDAY
I find that some of my most favorite photographs of my kids are ones I took at a more random time.  Like this one of my youngest and his messy face after he just had a sandwich (AND I had to take a picture of the sandwich to go with it because he wouldn't eat the crust and he put the pieces back in their spot after he was done!).  And like this other one of our family gathered around an ipad watching a funny youtube video together.  Remember to be random!
how to take more meaningful photos, random photos, messy face, cute kid photo
meaningful photos, how to take meaningful photos, family enjoying a funny video together
2.  YOUR PHOTO SUBJECTS DON'T ALWAYS HAVE TO BE LOOKING AT YOU AND SMILING
In fact, I LOVE these photos my sister in law took of my kids.  Landon was trying to tell us something and there was a time where he struggled with this. This photo was taken 4 years ago and I love these almost more than any I have of him smiling and looking at the camera because it reminds me of how cute it was to hear him talk! And then I love the angle of the 2nd picture.  My daughter was laying on the trampoline and I love seeing how her hair falls, her long eyelashes and sweet face. Think angles!  Take a picture from above, from below, from the side...it sure beats trying to ALWAYS get them to look at you and smile!  
3.  SAVE THE PHOTO TAKING FOR NEW EXPERIENCES!
  I tried something new this year and have an album called "Howell Adventures". 
take more meaningful photos, photo ideas, photo albums, preserve your memories
Whenever we tried something for the first time or went somewhere new, I tried to get just a couple pictures.  Not 30...just a few...just so we can remember what we did.  And then we documented it in the album with the date, location, and a short description. Not only did this give my photos more meaning, but it gave us motivation to see what other new things we could try and to find new places we could explore!!
take more meaningful photos, photo album ideas, family time ideas, preserve your memories
4. LESS POSING and MORE ACTION!
I love posed and smiling shots, but I also love the ACTION!  Seeing the looks on their faces when they are in the middle of experiencing something is priceless.  
kids excitement, trying something new, meaningful pictures, meaningful photographs

Monday, January 6, 2014

The 2 best ways to keep your digital photos under control

Hopefully you've all gotten started with Tasks 1 and Task 2 for this month!! Task #2 was "Organize photos & videos on your computer", and I wanted to give you a few more tips to help you with this seemingly daunting task. 

With digital photography comes the ability to take as many pictures as we want! This is SO helpful when we are trying to get the perfect picture.  But SO not helpful when we end up with thousands of photos for the year!  This is what I've learned:
1.  TAKE LESS PHOTOS
less is more, take less photos, too many digital photos, less = more
Think about it...how many photos do we have of our grandparents? Some more than others...but for me, I've seen maybe a few for each stage of their lives.  I don't know about you, but that's plenty for me! I don't mean that in a rude way...it's so fun to see them when they were young, but I think I would get SO bored if I were trying to look through 300 pictures for each stage of their life. 

So, as I thought about this, and as I spent SO much time going through all the photos I took, I made the decision to simply take less photos.  For me, this means I don't need 25 pictures of us picking out pumpkins, or 25 pictures of us baking sugar cookies, etc.  Don't get me wrong, it certainly FELT like I needed them at the time.  But remember this:  TAKING LESS PHOTOS OF YOUR KIDS DOES NOT MEAN YOU LOVE YOUR FAMILY LESS!!  You are actually doing a most wonderful thing!  Not only are you spending less time with a camera in your hand, but you are spending less time organizing your photos and stressing about what to do with them too!  This will give you MORE  time to spend with your family!

I want to quote from an article I found called "Too Many Photos, Too Few Memories" : "In 2014 it is estimated that 1.5 billion smartphone cameras will take nearly one trillion photos – that’s hundreds of thousands of photos every minute (three thousand in the time it took to read this sentence)...Every two minutes mankind collectively takes as many photos as the whole of humanity took in the 1800’s."

 Say Whaaaaat?!  Seriously people, is this necessary? The article questions if we are taking photos at the expense of creating genuine memories.  Go read the article...it's pretty interesting!

2.  DELETE
delete photos, keep digital photos under control, delete, why to delete photos
On the occasion that your finger gets "trigger happy" (so to speak) on your camera and you take WAY too many photos, that's ok!  Have no fear! There is an awesome feature called DELETE where you can select anything you want and delete it from your camera or your computer. :)  I think we get afraid to delete anything because it will be gone for good! And the pictures are SO cute...we just feel that we can't bear to delete them!  I understand your pain, I seriously do.  But you've got to get over it.  It's going to be ok. 
 
Really though, why is it so hard for some of us to delete our photos? There needs to be something called "Digital Hoarders Anonymous"!  I found an article on this and love their motto : "KEEP THE BEST, DELETE THE REST" (From Digital Photos : How to decide what to keep...great article...go read it!)

I sometimes like to delete photos straight from my camera.  Just take the 2 seconds it takes to delete the ones you know are blurry or duplicates, etc.  And then when you upload them to your computer and put them in a file under the correct month and year, just take a quick minute to go through them and delete any more that seem like duplicates.  I swear, I usually narrow my files down by HALF when I do this.  HALF of those photos I didn't need and now I don't have to deal with them cluttering up my computer and life and I STILL got some great shots to help me remember whatever it is I was taking pictures of!

With whatever pictures you end up with, be sure that you keep them organized on your computer!

Thursday, January 2, 2014

Keeping Videos & Photos Organized

organize videos, organize photos, keeping photos and videos organized on your computer, computer organization
Whether you are taking videos with your camcorder, your phone, or even your point and shoot camera...you most likely would like to put these on a dvd someday.  When it comes time for you to burn your dvd, it will make your life SO much easier if you have them organized on your computer! Same thing with photos.  I'm sure you don't mean for them to just sit on your computer.  You are going to want to DO something with them eventually.  Usually when you upload your video or photo files to your computer, it will look something like this:
These files can quickly add up and be all over your computer.  Don't let them pile up.  Keep them organized so you can find what you need easiest.  Here's what you need to do: ( I apologize for those using a Mac...I use a PC, so I'm not sure if the same filing system can work on a Mac)

Step #1 : Start by making sure the videos that you are putting on your computer, go into a file labeled for that YEAR.  Here you see that on my hard drive, I have labeled them Family Movies 2013, etc  I would suggest keeping photos and videos SEPARATE.  So you can make a separate file for Photos 2013, etc.
Step #2 : Create New Folders to hold your files in sections.  The number of folders you create will depend on how much video and photos you take, but I like to start labeling my folders by EVENT.  Like "Landon's Birthday", "4th of July", etc.  To create a new folder, you simply right click in an open space, and choose NEW and then FOLDER and then you can give that folder a name.
 Then you can highlight the group of videos/photos that belong in that folder and drag them in.

Step #3 : Now create more folders by MONTH.  They stay in order better if you label them 01, 02, 03, etc...instead of by month name.  And then drag which folders belong in their certain month.  For example, I dragged "Landon's Birthday" into 05-2013 because that is when it occurred. 
 Now they are organized and ready for you to burn to a dvd, or print a book, make a slideshow, etc. which I will talk about more in another post. 
 
FOR THOSE OF YOU FEELING OVERWHELMED:
 
I suggest starting with the most RECENT and work your way backwards.

START by creating folders for "Family Movies 2014" and "Family Photos 2014".  As it is the first week of January, you will probably not have any videos to put in there yet, but if you get your folders created, then you won't have to do it later.  Then inside "Family Movies 2014" create 12 folders for each month.  THEN throughout this year, when you go to put your videos on your computer...put them in the month they belong in. 

NEXT, work backwards by starting with "Family Movies 2013" and try to get them organized as I've shown you above.  Once you've finished 2013, continue working backwards by year. 

Depending how much you have to organize, it can take some time.  Don't get overwhelmed.  Just take ONE STEP AT A TIME and don't stress if your whole computer isn't organized by the end of the week.  Good luck to you!

Hopefully this gets you ready for the next step of actually DOING something with your photos!
Related Posts Plugin for WordPress, Blogger...